Threaded Fitting Assembly
Best Practice: Threaded Fitting Assemblies


The integrity of your process and instrumentation connections relies heavily on installation practices and procedures. We talk in some detail about correct installation practices for Swagelok tube fittings here; however, we'll use this space to talk a little more about threaded fitting assembly and best practices.
Here, There and Everywhere
When assembling a Swagelok product containing a threaded connection, it’s important to remember the threaded connection should always be assembled prior to the other connection because of the rotation required to assemble the threaded connection.
Step by Step
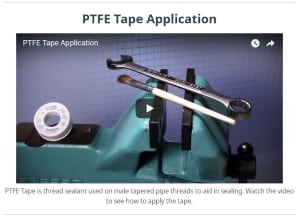
Following are instructions on how to assemble tapered threaded connections using PTFE thread tape:
Remove the thread protector from the male threads and remove any debris from the threads with a soft brush.
- Where possible, place the component containing the female threads into a vise. NOTE: Tighten the vise jaws ONLY on the flats, enough to securely hold the component in place and avoid damage to the component as a result of overtightening. Use a back-up wrench in applications where a vise cannot be used.
- While viewing the male threads from the open end, or face, of the threaded connection, locate the point where the root of the thread (dashed line) blends into the thread chamfer near the face of the fitting. This point is referred to as the
scratch mark.
- Place the edge of the tape on the crest immediately behind this point.
- use ¼ inch wide tape on ⅛, ¼ and ⅜ inch male tapered threads
- use ½ inch wide tape on larger male pipe threads
- While keeping the edge of the tape parallel to the face of the fitting, wrap the tape in the direction of the thread
spiral (clockwise) two to three revolutuions.
- Draw the free end of the tape around the threads tautly so that it conforms to the threads. Cut or tear off excess tape. Firmly press the tape into the threads. CAUTION: The tape must not overhang the first thread because the tape could shred and get into the fluid system media.
- Tighten the male end connection into the female end connection until finger-tight.
- Tighten the male end connection until wrench tight.
While there is no standard for torque or number of turns, ANSI/ASME B1.20.1-1983 states, “NPT taper pipe threads are intended to be made up wrench-tight and with a sealant whenever a pressure-tight joint is required.” Overtightening could result in stripping or galling the threads.
If the tapered pipe thread end connection happens to be on an elbow, tee, cross, valve, or pressure gauge where component position is critical, consider using a tube adaptor fitting so as to achieve the desired alignment of the component.
Build Your Knowledge
At Swagelok we provide not only the highest quality fluid system components, but also the knowledge and tools to ensure your success. Here are some of our additional resources:
Even the most experienced industry professionals sometimes have difficulty identifying threads, regardless of their thread identification procedure and the quality of their gauges. That's why we’re outlining our simplest form of thread identification as well as the tools required to correctly identify any thread you may come across.
Swagelok Tech Tip videos give you the how-to, from recorded webinars on Pressure Regulator selection to product installation and how to use Swagelok tools.
Watch the Thread Application Video Series
The Swagelok Tube Fitters Manual provides further, in-depth procedures and practices on thread identification and installation. The manual is intended to provide a quick reference to technically accurate design and installation information so installers can avoid many of the potential problems encountered during the installation of fluid systems.